The Home Assistant Green is a ready-to-use, turnkey appliance that comes with the software pre-installed; you simply plug it in and start automating. The Raspberry Pi 5 is a bare microcomputer that requires you to buy separate components (case, power supply, storage), install the operating system yourself, and manually configure the hardware, but it rewards you with significantly more processing power and versatility for advanced, multi-purpose projects.
Choosing between these two devices isn’t just about picking a processor; it is about choosing a philosophy. Do you want an appliance that just works, or do you want a platform that you can push to its absolute limits? Let’s dive into the details.
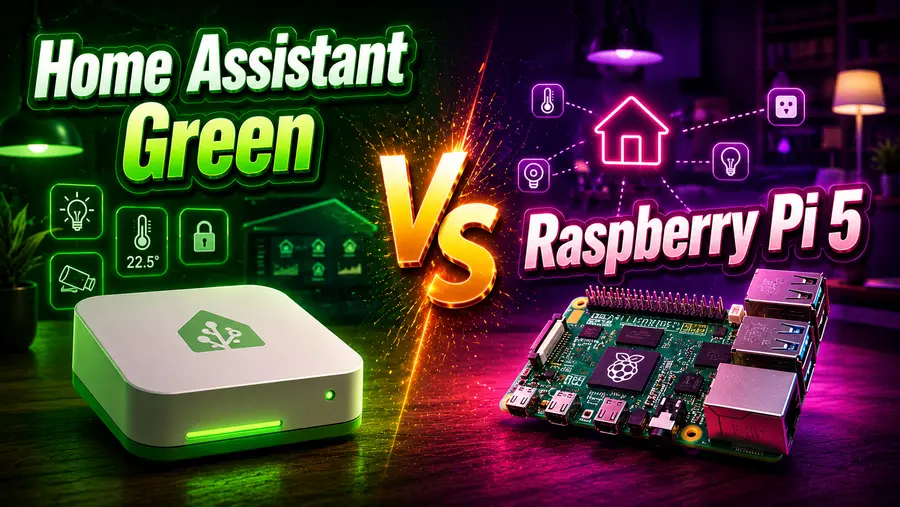
Home Assistant Green vs. Raspberry Pi 5: The Best Hub for Local Home Automation
Welcome to the wonderfully obsessive world of local home automation! If you are reading this, chances are you have realized a fundamental truth about smart homes: relying entirely on cloud servers for your lights, locks, and sensors is a recipe for frustration.
Cloud outages leave you in the dark, internet drops make your “smart” house incredibly dumb, and pinging a server halfway across the globe just to turn on a living room lamp is horribly inefficient.
Enter Home Assistant, the undisputed king of open-source, locally controlled smart home software. It gives you the ultimate power to bridge devices from Apple, Google, Zigbee, Z-Wave, and hundreds of other ecosystems into one unified, private dashboard.
But once you decide to take the plunge, you face the first and most critical hardware decision: What device should you run Home Assistant on?
As of 2026, the community debate heavily revolves around two champions. On one side, we have the Home Assistant Green, an official, purpose-built, plug-and-play appliance designed by Nabu Casa to make onboarding as painless as possible.
On the other side is the Raspberry Pi 5, the latest generation of the legendary single-board microcomputer that offers raw power and infinite tinkering possibilities.
Let’s go to pit the Home Assistant Green against the Raspberry Pi 5. Tear down their hardware, compare their setup processes, evaluate their long-term stability, and help you decide which hub is the perfect foundation for your smart home journey.
The Crossroads of Local Smart Home Automation
To understand why the Home Assistant Green and the Raspberry Pi 5 are the two most recommended devices for this software, we need to look at how home automation has evolved.
Historically, setting up a robust local smart home required a fair bit of technical grit. You had to buy a barebones computer, flash an operating system onto a storage drive, fiddle with command lines, and troubleshoot network interfaces.
The Raspberry Pi family became the de facto standard for this because it was cheap, low-power, and universally supported by developers. The Pi was the quintessential “maker’s” tool.
However, as Home Assistant grew from a niche hobbyist project into a mainstream alternative to proprietary hubs like Samsung SmartThings or Amazon Echo, the barrier to entry needed to be lowered. Not everyone wants to learn Linux just to make their porch lights turn on at sunset.
Recognizing this, Nabu Casa (the company behind Home Assistant) launched their own line of hardware, culminating in the Home Assistant Green.
Unboxing the Contenders: Hardware and Specs Explained
When we look under the hood of both devices, it becomes immediately apparent that they were engineered with completely different goals in mind. Let’s break down the technical specifications.
Home Assistant Green: The Optimized Engine
The Home Assistant Green is built around efficiency and cost-effectiveness. It is not trying to break any benchmark records; it is trying to do exactly one job perfectly.
- Processor: Rockchip RK3566 (Quad-core Cortex-A55 up to 1.8 GHz). This is a modest, highly power-efficient chip.
- Memory: 4 GB LPDDR4X RAM. For running Home Assistant OS (HAOS), 4 GB is more than enough to handle hundreds of automations, scripts, and device integrations smoothly.
- Storage: 32 GB eMMC. This is the killer feature of the Green. eMMC is solid-state storage soldered directly onto the motherboard. It is incredibly stable and immune to the corruption issues that plague cheap SD cards.
- Ports: Gigabit Ethernet, two USB 2.0 ports, standard barrel jack for power, and a micro-SD slot (strictly for recovery flashing).
- Connectivity: No built-in Wi-Fi or Bluetooth. It expects a hardwired Ethernet connection for maximum reliability.
Raspberry Pi 5: The Raw Powerhouse
The Raspberry Pi 5, released to massive fanfare, represents a massive leap in computing power over its predecessors. It is designed to be a desktop-replacement, a media server, and a robotics brain all at once.
- Processor: Broadcom BCM2712 (Quad-core Cortex-A76 at 2.4 GHz). This processor is leagues ahead of the Green’s RK3566. It crunches data faster, compiles code quicker, and handles heavy workloads effortlessly.
- Memory: Available in 4 GB, 8 GB, and 16 GB LPDDR4X variants.
- Storage: Relies on a micro-SD card by default, but crucially includes a PCIe 2.0 interface, allowing you to attach an NVMe SSD base for blazing-fast, enterprise-grade storage.
- Ports: Gigabit Ethernet, two USB 3.0 ports, two USB 2.0 ports, dual micro-HDMI (supporting 4K displays), USB-C for power, and a 40-pin GPIO header.
- Connectivity: Built-in Wi-Fi 5 (ac) and Bluetooth 5.0.
The Hardware Comparison Matrix
| Feature | Home Assistant Green | Raspberry Pi 5 |
| CPU Architecture | Quad-core Cortex-A55 @ 1.8GHz | Quad-core Cortex-A76 @ 2.4GHz |
| RAM Options | 4 GB | 4 GB, 8 GB, or 16 GB |
| Default Storage | 32 GB eMMC (Built-in, Highly Reliable) | Micro-SD (Prone to failure over time) |
| Storage Upgrades | None (USB drives allowed for backups) | PCIe interface for ultra-fast NVMe SSDs |
| Networking | Gigabit Ethernet Only | Gigabit Ethernet + Wi-Fi + Bluetooth |
| USB Standards | 2x USB 2.0 | 2x USB 3.0, 2x USB 2.0 |
| GPIO Pins | No | Yes (40-pin) |
| Power Draw | ~1.7W to 3W | ~3.5W to 12W (Under load) |
What does this mean for you? If Home Assistant is a highway, the Green is a reliable, fuel-efficient commuter car that will never break down on the way to work. The Raspberry Pi 5 is a sports car that you have to build yourself; it can go twice as fast, tow a trailer, and go off-road, but it requires more maintenance and a higher fuel budget.
Setup and Ease of Use: The “Plug-and-Play” vs. The “Maker’s Journey”
The initial setup experience is where these two paths diverge the most. The way you get these devices up and running will largely dictate how much you enjoy your first weekend with Home Assistant.
The Home Assistant Green Experience: Five Minutes to Automation
Nabu Casa designed the Green for people who want the benefits of local automation without the prerequisite of an IT degree. The setup process is almost boring in its simplicity—and that is a massive compliment.
- Take the translucent, sleek Green box out of the packaging.
- Plug the included Ethernet cable into your router or network switch.
- Plug the power adapter into the wall.
- Wait about two to three minutes for the system to initialize.
- Open a web browser on your phone or computer and type in http://homeassistant.local:8123.
- Create your admin account.
That’s it. The operating system (HAOS) is already flashed onto the internal eMMC drive. There are no SD cards to format, no flashing tools like BalenaEtcher to download, and no IP address hunting required.
As soon as you log in, Home Assistant’s autodiscovery feature immediately starts populating your dashboard with smart TVs, Sonos speakers, Apple TVs, and Philips Hue bridges it finds on your network.
The Raspberry Pi 5 Experience: Building the Foundation
Setting up a Raspberry Pi 5 is a classic “maker” ritual. It is highly rewarding, but there are multiple friction points where a beginner could make a mistake.
- Hardware Assembly: You receive a bare circuit board. You must carefully install it into a case, attach the Active Cooler (because the Pi 5 runs very hot), and secure the thermal pads. If you are using an NVMe SSD base (which you absolutely should for Home Assistant), you have to mount the M.2 drive, attach the delicate ribbon cable to the PCIe slot, and screw the bottom plate on.
- Software Flashing: You must download the Raspberry Pi Imager software to your main PC. You then select the Home Assistant OS image, select your target drive (the SD card or SSD via a USB adapter), and wait for the software to write and verify the image.
- Booting and Troubleshooting: Once flashed, you insert the drive into the Pi, connect Ethernet, and plug in the official 27W USB-C power supply. You wait for it to boot. If you are booting from NVMe for the first time, you may have to temporarily boot into the Pi OS to change the EEPROM boot order using terminal commands, which can be daunting for novices.
- Network Hunting: Finally, you navigate to http://homeassistant.local:8123. If your router’s mDNS isn’t playing nicely, you might have to log into your router’s admin page to find the Pi’s assigned IP address manually.
The Verdict on Setup: The Home Assistant Green wins flawlessly here. It eliminates the anxiety of hardware building and software flashing. If you want to spend your weekend actually creating automations rather than building the machine that runs them, the Green is the undisputed champion.
Performance and Stability: Power vs. Purpose-Built Reliability
Once the hub is sitting in your utility closet, how does it hold up after six months, a year, or two years of 24/7 operation? Smart homes generate an immense amount of data.
Every time a temperature sensor fluctuates by a degree, every time a motion sensor trips, and every time a light turns on, Home Assistant writes that state change to a database.
The Storage Bottleneck: Why SD Cards Die
For years, the biggest complaint about running Home Assistant on a Raspberry Pi was the “Dead SD Card” syndrome.
Micro-SD cards were designed for cameras—writing large sequential files occasionally. They were not designed for an operating system constantly writing thousands of tiny database logs every second.
Within 12 to 18 months, SD cards on standard Pi setups often corrupt, completely crashing the smart home.
How the Green solves this: The Home Assistant Green bypasses this entirely by using eMMC (embedded MultiMediaCard) storage. While not as blazing fast as an NVMe SSD, eMMC is significantly more resilient to constant read/write cycles than an SD card. It is the same type of storage used in many smartphones and budget laptops. It provides rock-solid, set-it-and-forget-it reliability.
How the Pi 5 solves this: The Pi 5 is the first Raspberry Pi to feature a native PCIe interface. By purchasing a third-party NVMe HAT (Hardware Attached on Top) or base, you can install a full-fledged M.2 SSD. An NVMe SSD offers terabytes of write endurance and read/write speeds that dwarf both SD cards and eMMC. An NVMe-equipped Pi 5 is practically indestructible from a storage perspective.
Raw Processing Power: Do You Need It?
For standard home automation—turning on lights, running complex Node-RED logic, tracking presence, and integrating hundreds of sensors—the Cortex-A55 in the Green is perfectly adequate. The system is optimized so well that even with a heavy load, you likely won’t see CPU usage spike above 20%.
However, the Raspberry Pi 5’s Cortex-A76 absolutely destroys the Green in heavy lifting. Why would a smart home need heavy lifting?
- Video Processing (Frigate): If you are running local security cameras and using Frigate to perform AI object detection (e.g., distinguishing between a person, a dog, or a car in real-time), the Pi 5’s processor can handle this infinitely better than the Green. (Note: Even with a Pi 5, a Google Coral TPU is recommended for AI vision, but the Pi 5’s USB 3.0 ports ensure the TPU doesn’t bottleneck).
- Massive Databases: If you are storing years of granular sensor data using InfluxDB and visualizing it in Grafana, the Pi 5 will render those heavy graphs instantly, whereas the Green might take a few seconds to load a year-long dataset.
- Add-on Overload: If you run dozens of Home Assistant Add-ons simultaneously, the 8 GB or 16 GB RAM variants of the Pi 5 ensure you will never hit a memory ceiling.
The Verdict on Stability & Performance: The Green offers out-of-the-box, optimized stability that requires zero extra thought. But if you have heavy, data-intensive use cases—specifically local AI camera processing—the Pi 5 equipped with an NVMe SSD is in a league of its own.
Expandability and Versatility: What Else Can You Do?
A smart home rarely stops at just Wi-Fi devices. Eventually, you will want to integrate Zigbee (for cheap, low-power battery sensors), Z-Wave (for hyper-reliable in-wall switches), or Matter/Thread (the new global smart home standard).
Dongles and Smart Home Protocols
Neither the Green nor the Raspberry Pi 5 comes with Zigbee, Z-Wave, or Thread built into the board. Regardless of which device you buy, if you want to use these protocols, you will need to purchase a USB coordinator, such as the official Home Assistant Connect ZBT-2 (formerly SkyConnect) or a Sonoff Zigbee 3.0 dongle.
- On the Green: You simply plug the ZBT-2 dongle into one of the USB 2.0 ports. USB 2.0 is perfectly fine for radio dongles, as the data bandwidth required for a Zigbee signal is minuscule.
- On the Pi 5: You have USB 2.0 and USB 3.0 ports. Crucial Tip: Always plug Zigbee/Z-Wave dongles into USB 2.0 ports using a USB extension cable. USB 3.0 ports emit intense 2.4GHz electromagnetic interference that can severely cripple Zigbee networks.
The Versatility of the Raspberry Pi 5
Here is where the Raspberry Pi 5 asserts its dominance. The Home Assistant Green is an appliance. It runs Home Assistant OS, and it cannot run anything else. It does not have GPIO (General Purpose Input/Output) pins, so you cannot wire a physical relay or a temperature sensor directly to the motherboard.
The Pi 5, on the other hand, is a general-purpose computer.
- GPIO Pins: You can wire physical breadboards, LEDs, and custom electronics directly to the Pi’s pins and control them via Home Assistant.
- Multi-Tasking with Docker: Instead of running the dedicated Home Assistant OS, a power user could install standard Debian Linux on the Pi 5. You could run Home Assistant in a Docker container, and use the rest of the Pi’s massive resources to run a Plex Media Server, a Pi-hole (network-wide ad blocker), a local NAS (Network Attached Storage), and a local VPN server—all simultaneously.
- Desktop Use: With dual HDMI ports, you could technically hook the Pi 5 up to a monitor and use it as a desktop PC while Home Assistant runs silently in the background.
The Verdict on Versatility: If you want a dedicated smart home hub, the Green’s limitations are actually a benefit (fewer moving parts = fewer things to break). But if you want a miniature tech-lab that can serve five different purposes in your network rack, the Pi 5 is the ultimate playground.
Cost and Value: Which One Actually Saves You Money?
When evaluating the cost, we have to look past the base price of the motherboards and calculate the Total Cost of Ownership (TCO) for a fully functioning, reliable setup. Let’s crunch the numbers based on standard 2026 pricing.
Pricing the Home Assistant Green
The beauty of the Green is that the sticker price is the final price.
- Base Unit: ~$99 to $139 (depending on global region, import taxes, and retailer markups).
- Includes: The motherboard, the custom aluminum heatsink enclosure, the power supply, and a Gigabit Ethernet cable.
- Total Cost: ~$99 – $139. You don’t need to buy a single additional item to get it running.
Pricing the Raspberry Pi 5 (The Reliable Setup)
While the bare Raspberry Pi board seems cheap, outfitting it for long-term smart home reliability adds up rapidly.
- Raspberry Pi 5 Board (4 GB): ~$60.
- Official 27W USB-C Power Supply: ~$12 (Do not skimp on this; Pi 5s are power-hungry and standard phone chargers will cause under-voltage crashes).
- Active Cooler: ~$5 (The Pi 5 throttles without active cooling).
- Official Case (or third-party): ~$10.
- NVMe Base / PCIe HAT: ~$15 to $25.
- 256 GB NVMe M.2 SSD: ~$25 to $35.
- Total Cost: ~$127 to $147 (And significantly more if you opt for the 8GB/16GB RAM versions).
Energy Consumption Costs
Smart home hubs run 24 hours a day, 365 days a year. Over a 3 to 5 year lifespan, power consumption matters.
- The Green: Sipping between 1.7W and 3W of power, the Green is remarkably eco-friendly. It barely registers on your electricity bill.
- The Pi 5: The Broadcom chip is thirsty. Depending on what you are running, it will draw between 3.5W at idle and up to 12W under heavy load. While still cheaper than leaving a light bulb on, it will cost slightly more over a few years than the Green.
The Verdict on Cost: For a purely apples-to-apples reliable smart home setup, the Home Assistant Green is the better financial value. It offers a cheaper initial buy-in and lower ongoing electricity costs. The Pi 5 is only a better value if you plan to leverage its power to replace other devices in your home (like using it as a media server instead of buying a separate one).
The Verdict: Which Hub Should You Buy?
We have looked at the hardware, the setup, the stability, and the costs. The truth is, there is no single “best” hub—there is only the best hub for you. Both platforms are fully officially supported by Nabu Casa and receive regular HAOS updates. Your choice comes down to what kind of user you are.
You Should Buy the Home Assistant Green If:
- You are a beginner to Home Assistant. If you have never used Linux, flashed an OS, or configured a microcomputer, do not make the Pi 5 your first project. The Green guarantees a successful, frustration-free day one.
- You want an appliance, not a hobby. If your goal is simply to make your lights dim when you turn on the TV, and you want to set it and forget it, the Green is for you.
- You value reliability and low maintenance. With integrated eMMC storage, the Green will happily run for years in a closet without ever throwing a storage error.
- You are migrating from SmartThings, Hubitat, or Homebridge. It provides the smoothest transition path for those used to commercial, boxed hubs.
- You are buying a gift. If you are setting up a smart home for your parents or a non-technical friend, the Green is the only responsible choice.
You Should Buy the Raspberry Pi 5 If:
- You are a tech enthusiast or a tinkerer. If the idea of building the hardware and configuring boot loaders excites rather than terrifies you, the Pi 5 is your canvas.
- You plan to use Local AI and Frigate. If you want to pull in multiple 4K security camera feeds and run local AI object detection, the Pi 5 has the raw compute bandwidth to handle the data flow.
- You want to run multiple heavy services. If you want to use the same machine to block ads via Pi-hole, host a small website, run a Plex server, and handle home automation, the Pi 5 (especially the 8GB or 16GB models) is a beast.
- You love GPIO projects. If you want to solder your own environmental sensors or control custom relays directly from the board’s pins, the Pi is essential.
- You want infinite upgradeability. Adding an NVMe SSD allows for massive databases, instant reboots, and lightning-fast log writing.
Conclusion
The 2026 smart home landscape is richer and more accessible than ever, and both the Home Assistant Green and the Raspberry Pi 5 represent the pinnacle of local, privacy-first automation.
If your priority is peace of mind, immediate results, and a seamless transition away from cloud-based platforms, the Home Assistant Green is an unparalleled, affordable masterpiece of purpose-built engineering. It democratizes local home automation, proving that you don’t need to be a software engineer to own your data.
Conversely, if you view your smart home as a dynamic, ever-expanding laboratory, the Raspberry Pi 5 offers unmatched horsepower, massive expandability, and the thrilling freedom to build a system tailored exactly to your wildest technical ambitions.
Whichever path you choose, committing to local control is a decision you will never regret. Welcome to the future of the smart home.
References
- Nabu Casa. (2026, January 8). Changes to Home Assistant Green pricing. Home Assistant Nabu Casa Blog. Retrieved from https://www.nabucasa.com/news/2026-01-08-green-pricing-change/
- Raspberry Tips. (2026, June 21). Home Assistant Hardware Comparison 2026: Green, Blue & Yellow vs. Raspberry Pi. Raspberry Tips Tutorials. Retrieved from https://raspberry.tips/en/raspberrypi-tutorials/home-assistant-hardware-comparison-2026-green-blue-yellow-vs-raspberry-pi
- Seeed Studio. (2024, September 6). Home Assistant Green vs Raspberry Pi, Which One Should You Buy for Home Assistant? Seeed Studio Latest News. Retrieved from https://www.seeedstudio.com/blog/2024/09/06/home-assistant-green-vs-raspberry-pi-which-one-should-you-buy-for-home-assistant/
- Mon Raspberry. (2024). Raspberry Pi 5 vs Home Assistant Green: which one to choose for home automation? Mon Raspberry Guides. Retrieved from https://monraspberry.com/en/raspberry-pi-5-vs-home-assistant-green/
- Reddit Home Assistant Community. (2025/2026). HA Green or Raspberry Pi 5? Discussions and User Experiences. r/homeassistant. Retrieved from https://www.reddit.com/r/homeassistant/comments/1q2png2/ha_green_or_raspberry_pi_5/
Read Here: How Green Computing Reduces Data Center Carbon Footprints